 As a floral & event design company, the holidays are such a busy time for us. We are always running around working on holiday decor installations for homes, stores, parties, and more. It's such a fun, festive time, but sometimes we're so busy decorating others' places that we forget to add a little festive touch to our own homes. We were determined that this year was going to be different. So... Priska (P) & I took an afternoon to bring the holiday spirit home. With a little Christmas music playing in the background, a pumpkin spice latte for P and a mocha for me (that's pretty much what gets us moving), we were ready to get started.
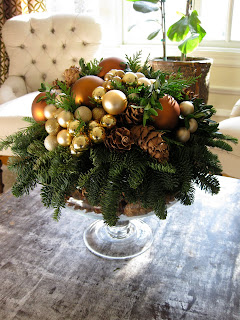
We both made table centerpieces, since we'll be having Christmas dinners with the families. We thought this was a perfect arrangement to show you how to make. The great thing about this arrangement is that it's quite elegant and it looks quite complex, but really (our little secret) it's quite simple. This is the perfect arrangement to give to a hostess, your in-laws, or to a close friend. It can be used as a centerpiece, an entryway arrangement and much more.
A few items that you will need:
ball ornaments in an assortment of sizes (you can choose any color that you like)
floral tape
1 block of floral oasis
glue gun
glue stick
clippers
floral wire
glass vase
loomy dish
small pinecones
pine branches
Step 1: Place the oasis in a bucket of water. Let the oasis soak up the water without pushing the oasis down in the water. If you let it soak up the water naturally you are sure to have the inside of the oasis completely wet.
Step 2:
Place the plastic liner in the vase and then put small pinecones around the liner.
Step 3: Cut the floral oasis to fit on the loomy dish. Shave the corners of the floral oasis so that they are rounded rather than sharp corners.
Step 4: Place the loomy dish on top of the plastic liner and secure the oasis/loomy dish down with floral tape.
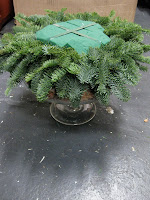 Step 5: Clip small pieces of pine branch and begin inserting them into the oasis. It's ideal to insert the pine at a downward angle so that the branches are covering the edge of the vase and hiding the oasis.
Step 6: Wire pinecones and ball ornaments so that you will be able to insert them into the oasis as well.
Step 7: Continue adding pine branches into the oasis and mixing in some pinecones and ball ornaments. It's nice to group the balls and pinecones in clusters. Continuously turn the arrangement to see that it's even and balanced all around.
Step 8: Once the arrangement looks full and there are no empty spaces use the glue gun to tightly connect the ball ornaments together. You really just need a dot of glue here and there.
Step 9: Voila, you have made a beautiful arrangement. Place in the perfect location and enjoy!!!